Since relatively recently, many users began to notice the appearance of error 1603 when installing “Skype” new versions instead of obviously outdated ones. Fix this problem is not obtained at all and not always. Therefore, it is necessary to find out what exactly prevents the normal installation of the updated application modification, how to fix the situation and not repeat their mistakes in the future.
The causes of the error 1603 when installing "Skype"
To get started, let's briefly dwell on the reasons for this behavior of the installer. Please note that in most cases, this can only be associated with the operating system itself indirectly, but mainly applies only to program components. It is believed that the crash when trying to update Skype for Windows 7 or systems of a rank higher occurs mainly due to the fact that the previous modification of the program was uninstalled incorrectly, due to which some undeleted components in the form of plug-in manager files remained on the hard disk (Skype Plugin Manager), which in the cache does not find the object of the same name in the MSI format. It happens and vice versa. Only in this case, the presence of residues leads to the interruption of the installation process, since the installer believes that the desired program is already installed.
Error 1603 occurred while installing Skype: what should I do?
But let's see what steps can be taken if the program was deleted incorrectly. First, try downloading the new version of the application and before starting the installation, find and delete the plug-in manager directory in advance, which, as a rule, is located in the Skype directory located in the program files folder. Some users believe that this will be enough to complete the installation of the new version without any problems. However, such actions can be called incomplete, since registry entries related to the uninstalled application still remained.
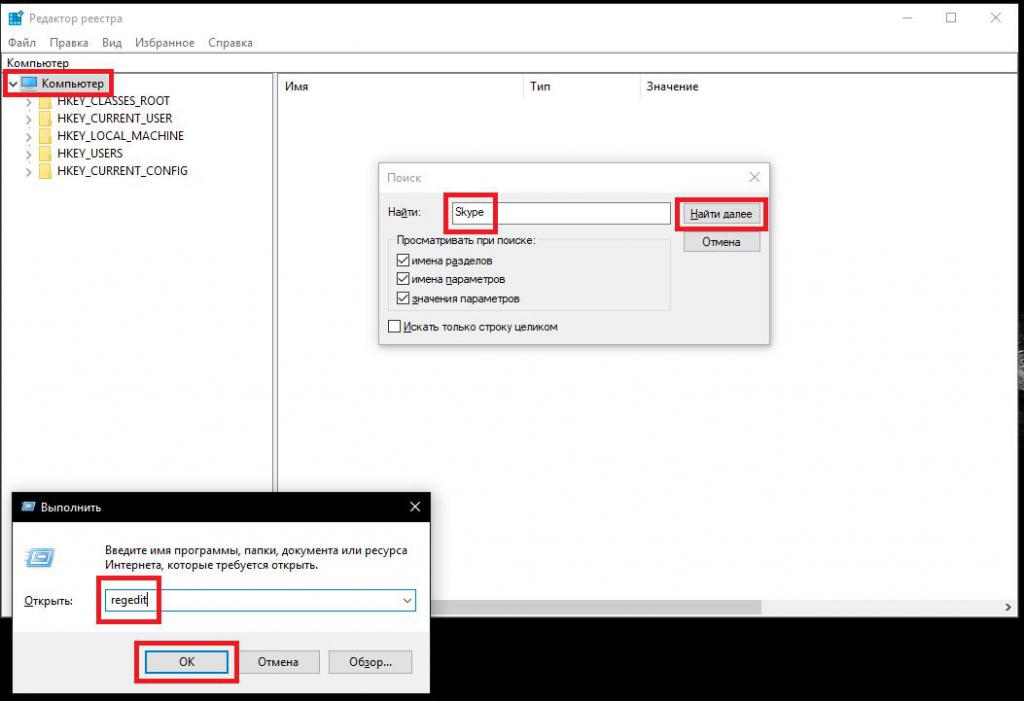
That is why, if there are no cleaners or registry optimizers on hand, it is strongly recommended that you go to the editor (regedit), search for (Ctrl + F) the name of the program (Skype) and delete absolutely all the keys found, moving from one found item to another by pressing the button "Find more ..." or the F3 key. When the search is over, and all entries are deleted, just in case, by analogy, search and get rid of all the files and folders of the program on your hard drive using the most common “Explorer” for this. After completing all the steps, be sure to restart the computer and try to install the application as a new version again.
Using Uninstallers and Fix Utilities
However, you can get rid of error 1603 when installing Skype using the use of special uninstaller programs.
Many of them, in particular, iObit Uninstaller, automatically detect incorrectly deleted applications and give suggestions on how to clean up residues. If this does not help, the appearance of error 1603 during the installation of Skype can be avoided by using the universal fix utility from Microsoft (Fix It), which can be downloaded absolutely free from the official Internet resource. After starting the program, by starting the executable file on behalf of the administrator, scanning starts, at the end of which it will be offered to choose one option from the two. Select the identification of problems with the installation of patches (the item will be marked as recommended).
Next, go to the uninstall point, check the Skype program in the list, and then use the “Try to uninstall” item.
Note: if the application is not listed, in Windows 7, open the Application Data folder in the Users directory on drive C, go to the Skype directory, write down or copy the names of all the folders that will be presented there. After that, in the Installer directory located in the root of the system (Windows), delete all links with previously defined names and numbers. After that, in the Fix It utility, enter any of the folder codes from the Skype directory in Application Data and select the attempt to delete again.
Last few tips
Finally, in order to avoid such a failure in the future, never interrupt the process of uninstalling a program, do not delete files and directories of an application manually without using uninstall tools, and do not uninstall using system tools like the program and component section, but use uninstall programs that clean up trash remaining in the system automatically. Sometimes it is advisable to use optimizers to clean the system of computer debris, which have modules for scanning the registry and removing unnecessary files from the hard drive.
Note: before deleting a program, you always need to stop its work and exit the application through the menu icon in the system tray.