A glare is a bright spot that occurs due to the reflection of light on an object. In many pictures, this effect looks very nice, and most often photographers specifically achieve it in the photo. But sometimes a glare makes the picture ugly and attracts too much attention. In fact, it’s very easy to naturally remove a flaw. About how to remove glare in Photoshop, and will be discussed in this article.
Preparatory step
The first step is to carefully examine the flare. There are several options:
- There is only a white spot in place of the flare, the texture is completely lost.
- The effect is a slight overexposure while maintaining the texture of the subject.
In the second case, it is very easy to remove the defect, it is enough to take the brush darker and process the area until it matches the whole object in black and white.
First case
The problem with a white spot is more difficult to solve than the above example. Most often, photographers mask such flaws using the Stamp or Patch tools. But this method is not good enough, because the brightness, shape and, of course, the texture of the subject itself are lost.
The most difficult option will be the photograph in which the object has a spherical surface. To remove glare on the face in Photoshop is just one of such examples. About how all the same, quickly and efficiently put a photo in order, and we will talk further.
How to remove glare in Photoshop and return details
- After adding a picture to Photoshop, you need to make a copy. To do this, right-click on the thumbnail and select the option “Duplicate layer”.
- The next step is again to inspect the picture. If there is a glare, then there must be a part of the object that is not illuminated by it. It needs to be transferred to a white spot.
- To finally start working on a glare, you need to localize it. To do this, a “Layer Mask” is created, it is located on the thumbnail panel at the very bottom.
- After you need to highlight the disadvantage so that the transition is soft and smooth.
- First you need to go to the "Selection" menu and select the "Color range". In the dialog box that opens, select the item “Black backing” and adjust everything so that the highlight turns white, and everything else is as dark as possible.
- After everything is finished, click on the “OK” button, and a highlight will appear on the photo. And now the mask that was opened before that, paint over with a black brush.
- Then wash the stain using the “Masks” window so that there are no torn edges. This is how you can easily remove glare in Photoshop.
Texture Creation
After the work with the glare has passed, it must be filled with texture. After that, you need to take the Lasso tool and select the entire object. It is not necessary to do it for sure, in the future all the flaws will be smoothed out.
After everything is ready, you need to transfer the selection to a new layer using the right mouse button. Then begins the time of creativity: the object must be moved so that it covers the glare on the source, while the texture along the edges coincides as much as possible. To do this, you can scale and resize the layer. The final step is to erase everything that is unnecessary with a soft eraser so that the glare on the source is not affected, and everything looks as natural as possible.
That's the whole answer to the question "How to remove glare in Photoshop?"
The manifestation of the invoice
After the previous step has been performed a sufficient number of times, you can proceed to align the black and white pattern.
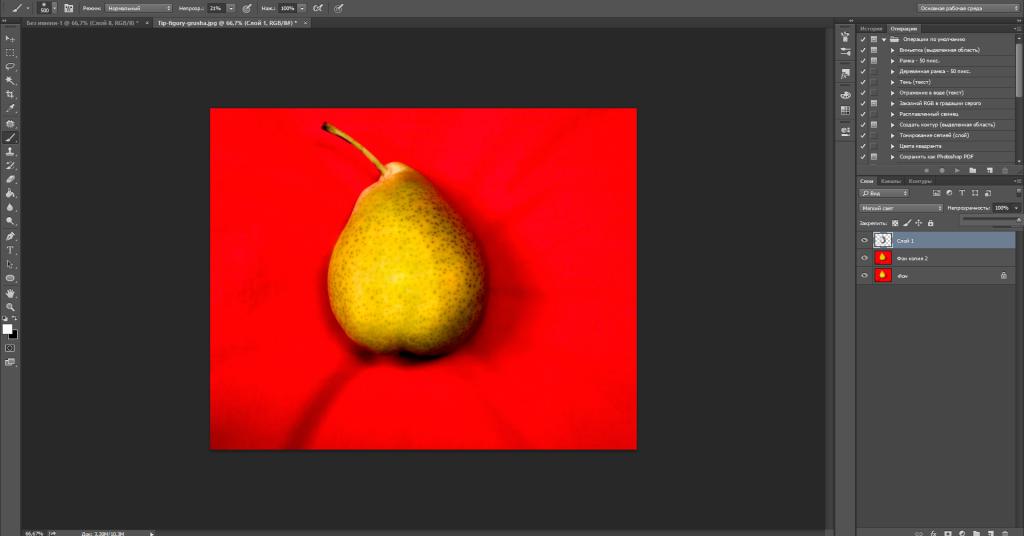
First you need to create a new layer with the “Soft Light” option and take the white and black brushes. Now you need to draw glare and shadow over the entire object where they were. When everything is done, you need to tighten the “Opacity” slider so that everything looks as natural as possible.
Having created the necessary light pattern, you can proceed directly to the manifestation of the texture, and for this you need to go to the filter menu, select the “Other” parameter and find the “Color contrast” sub-item in it. In the dialog box that opens, you need to set the value to about 7 pixels, it is better to align with the photo above and try to achieve the same result in any photo. Having set the “Overlap” layer mode, you need to turn on the “Mask” and fill it with black, after which with a white brush with an opacity of 20%, draw the highlight area to show the texture of the material.
You can remove glare from a flash in Photoshop, as well as from the sun, in this lesson.