What is the plot of the game Cold Fear (PS2, PC and Xbox)? US Coast Guard officials receive a signal about a strange Russian whaling vessel that does not show any signs of life. The rescue team is entrusted with exploring the ship, however, upon arrival, the team loses touch with the base and mysteriously disappears from the air. The last transmission, caught by the radio station, shocked everyone with creepy screams and the sounds of indiscriminate shooting. Then Tom Hansen, a security officer, leaves for the ship, for whom this operation becomes the first rescue mission in a long time. It is up to him to find out what really happened on the Russian ship and why the connection with the search team was lost.
From this moment begins the passage of Cold Fear - a game in the genre of action-horror, released back in 2005 under the leadership of the studios Darkworks and Ubisoft. Despite the fact that enough time has passed since the release, the project is still popular with a certain circle of gamers. Today we prepared a detailed walkthrough of the game Cold Fear, in which we collected the most important and useful tips for each level. But first, some technical information.
What is important to know before starting the game?
The project came out on all major platforms, which means that we can launch Cold Fear on Xbox, PS2 and PC. Since the game, by technical standards, is considered "old", then it can be launched without any problems only on older systems. It’s unlikely that you can enjoy Cold Fear on Windows 10, because the project remains not optimized.
You can access the game in several ways: buy it on one of the digital trading platforms (for example, on Steam) or download the Cold Fear repack from the Mechanics. Moreover, it is often the versions downloaded from torrents that have additional patches that help the application work without errors. As for the codes or cheats for Cold Fear, we will talk about this at the very end of our guide.
It is also possible to download the game emulator to your PC. If you do a good search on the Internet, you can find both the version of Cold Fear for PS2, and for Xbox.
After starting the game, you may encounter another problem - a stretched image. Usually this happens due to incorrect image transmission on modern monitors. Correcting the situation will help setting the resolution of Cold Fear through a simple Widescreen Fix, which can be downloaded from the Internet.
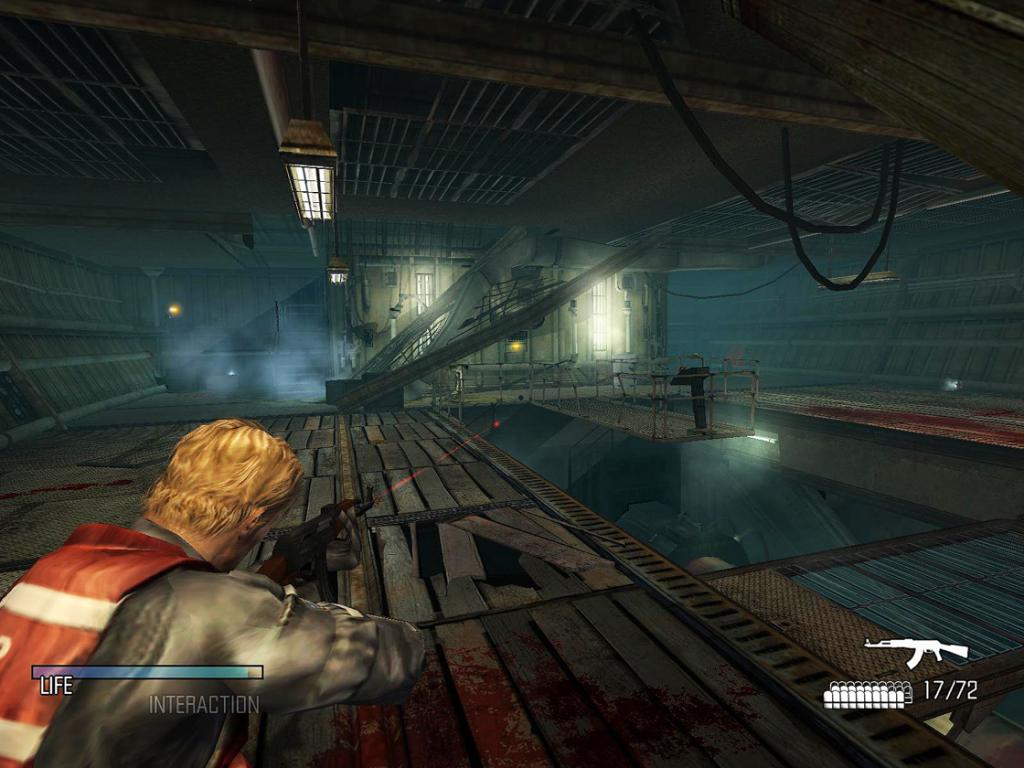
Part 1. On the deck
We disembark on the deck of the ship and first of all we select a note. In general, throughout the passage of Cold Fear we will meet a variety of letters, documents and notes. We advise you to select and read them all, as they contain interesting information about the plot of the game. We go to the very end of the deck, climb to the upper platform and move towards the opposite side of the ship. Ahead we will encounter small difficulties, such as swinging pulleys and rolling waves. We get to the corpse and search it for munitions.
We go further down the corridor and find several barrels of flammable liquid. We shoot at them and observe a powerful explosion in which two sailors die. Next we get to the blue gate and block it - now we can go into the previously blocked corridor.
Part 2. From the weapons warehouse to the rest room
Continuing our guide to Cold Fear. Location 2 is interesting because here you can replenish our ammunition. Having searched the locker and the corpse, we leave the warehouse and go down to the lower level. On the main deck, we are waiting for another note on electrical boxes. Then we go down even lower and reach the hold on which the freezers are located. In the middle of the room, in the water, there will be some shapeless heap - we come closer and we see the next corpse of a sailor. If you search it, you can find the key that opens the door to the upper deck.
After this point, the game will provide an opportunity to replenish the spent HP through medkits. Such first-aid kits are located not only in random places, but also in special rooms that can be found on the doors with red crosses painted on them. The first opportunity to use the medkit will already be on the upper deck. We continue our movement along the corridors of the location, simultaneously picking up ammunition and diaries. We reach the rest room and deal with the two sailors who are inside. We leave the room.
Part 3. From the galley to the upper main deck
In the kitchen, a small surprise awaits us in the form of a dead man falling out of the refrigerator. We do not pay much attention and go to the exit. Once on the front deck, we move towards the boxes covered with an awning. We pick up the next note, cartridges and go to the narrow bridge. There we will encounter a couple more opponents - we kill them and go down to the lower level. As soon as we reach the containers, another sailor will appear on the way - we will deal with him and continue our way towards the kubrick.
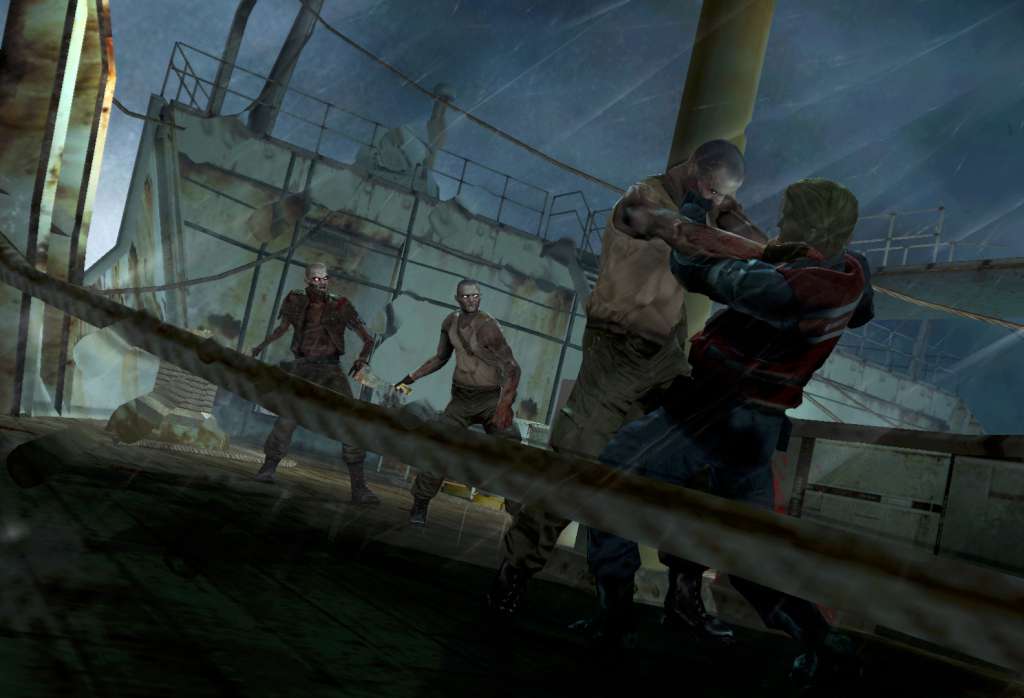
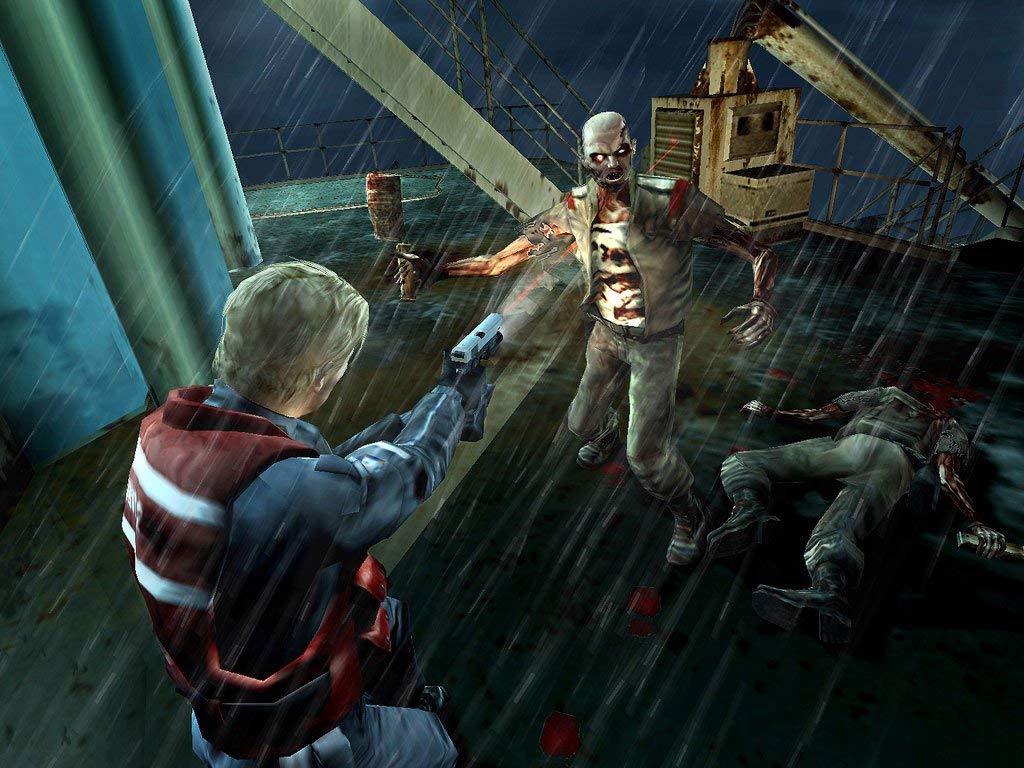
There are no signs of life in the room. We slowly move along the cockpit, simultaneously searching the corpses and collecting notes. In the bathroom we find dead Lansing. We go back to the main compartment of the cubicle and see the following picture - the motionless corpses turned into bloodthirsty zombies! We make our way to the exit, shooting everyone in their path. We advise aiming at the heads, otherwise the dead cannot be defeated. Finally, we are on the front deck and meet with the survivor, fighting off three zombies - we deal first with the dead, and then with the sailor himself. We get to the lower deck. Now you need to use the valve to extinguish the flaming fire. We pass the burning zombie and run forward to the door leading to the upper main deck. We pass the arms depot and look into one of the cabins, where the survivor ran earlier.
Part 4. From hold No. 5 to the captain’s bridge
We shoot at the fire extinguisher and kill the explosion of a sailor hiding behind one of the columns. We take the wheel from the door, the medkit and run back to the corridor. On the way to the stairs, a zombie will attack us - we kill him and go down. Use the wheel to open the door to the fish hold. Once inside, we pass into the compartment designed for cutting whales. We collect notes, first-aid kits and cartridges, then we go around the cutting table and pick up the key to the door to the radio room. The last action activates the appearance of small monsters that begin to crawl out of the dead killer whale. We deal with them, resorting to the help of fire extinguishers and various valves, and leave the room.
We get to the lower deck, kill the monsters and find the stairs that open the passage to the captain’s bridge. We go upstairs, kill two corpses, search the bridge for the presence of ammunition. After stripping, we boldly pass into the Radio Room.
Part 5. From the radio room to the engine room
There is a radio node in the corner of the room - we use it to transmit all the information we have collected. After that, we will be instructed to find Colonel Dmitry Yusupov, who, according to the CIA, should be on the same ship. We leave the cabin, having previously taken with us a note on harpoons, and we descend to the lower level. Before this point, we advise you to save. We pass through several doors and find ourselves on the front deck of the ship. At the port side, where the warehouse is located, a couple of zombies will be waiting for us - we will deal with them and go inside the room. We pick up the machine gun lying on the floor and shoot the dead dead in time with it. Do not forget to grab another note before returning.
We get down to the back deck - the very location on which we were at the beginning of the game. Our task is to reach the very end. Among the obstacles on the deck we will meet: one zombie, surging waves and pulleys swinging on the ropes. We pass all this and climb the stairs to the upper platform. We kill one of the crew members and run into the rear cabin. Inside we will meet wounded Yusupov. Unfortunately, it will not be possible to save him, since immediately after our dialogue with him, the character is killed by a small creature sitting on his body. We quickly deal with it, and then inspect the control panel where the harpoon gun lies. We grab a new weapon, pick up cartridges and a note from his diary from Yusupov’s body, and then leave the room.
We get down to the back deck and kill a couple of the dead. We continue our way, bypassing burning barrels and a swaying bale, also enveloped in flames. We pass through the next door and encounter an unusual zombie, from the body of which there will be another vile creature. After that we go down to the engine room. Inside will be the entrance to the premises of the screw shaft, locked with a key. We go forward to the place where the electric box is located, and then shoot at it. We rise to the site and deal with the dead dead. Now we need to shoot at the barrels in which the fuel is located. From the resulting explosion, a monstrous uterus will die, producing those same vile creatures that we met before. We clean the room from the remaining monsters, pick up the key and go back to the room.
Part 6. From the helical shaft room to the freezing hold
We climb to the upper level, where we find a shotgun. We get to the control panel and click on one of the buttons - now we can cross the propeller shafts on a special bridge. We will continue our journey, simultaneously firing off random zombies and picking up valuable supplies. Near the far wall, on one of the drawers, there will be a wheel from the door leading to the fish hold - grab it and run to the stairs. We shoot at the electrical box and go inside the next room. Through the upper floor we go down to the engine room.
We pass through several corridors, the last of which leads into the cargo hold. On the way, we will visit the freezer No. 3 - there, on the floor, will be part of the diary of the deceased Yusupov, as well as several ammunition. Even more ammunition, along with a first-aid kit, can be found in freezer No. 4, so we advise you to look there too. Returning to the corridor, we climb to the site located on the left, and go into the room intended for slaughtering whales. Cross the bridge on which there are three zombies, and head to the exit. Inside the hold there is a small flood and an obstacle in the form of an electric discharge. We will wait a bit until the path becomes safe, and then quickly run towards the stairs.
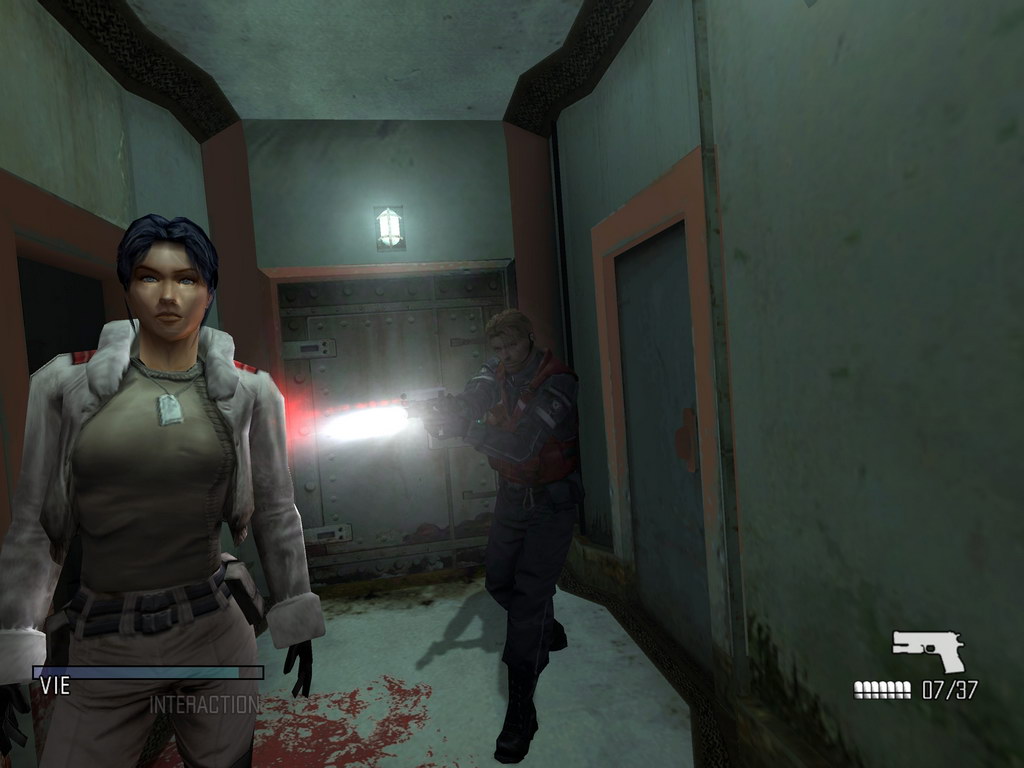
Part 7. From the main deck to the pumping station
We pass the weapons warehouse and turn right first and then left. We pass through the door on which the red panel is located, and we meet with a character named Anna - we received information about her earlier from the late Yusupov. Anna needs to get to the radio room, so we grab the ammunition, first-aid kit and hit the road. We go back to the main deck and keep heading towards the arms depot. As soon as we get closer, there will be a strong explosion inside the room, which will knock the door. We do not pay attention and continue our journey. We get down to the lower deck and get into the cabin.
Anna will send a signal to the drilling platform and will contact them. After completing the conversation, the girl decides to stay in the wheelhouse, and we have to find the radio code. Heading for the front deck. As soon as we are in place, several dead men will attack us immediately. We deal with all the opponents, collect supplies from them and go to the bridge. Further, adhering to the left side, we continue to go forward until we stumble upon the door with the sign "Warehouse". Through this room you can reach the rear deck. We carefully cross the part of the vessel washed by the waves and climb to the top floor. The door leading to the pumping station is located near burning barrels - we go inside and clean the room from monsters. We will examine the room for the presence of valuable and interesting things. On one of the boxes will be a note on the pumps - it must be read. Then we’ll use the switch and turn on the pump, which will get rid of the water in the hold with the flood and electricity.
Part 8. From the engine room to the captain’s cabin
Continuing to share the secrets of Cold Fear. We go down to the lower level and find ourselves in a well-known room. We deal with several monsters and go down even lower. We go to the site with one single exit, go inside and cross the corridor leading to the hold. Once in the room, we quickly shoot first at the electric box, which is located on the pole, and then at the barrel that stands next to the box. We kill the remaining dead, collect supplies and go up. We go along the long corridor to the freezer No. 2. Inside we will meet a zombie who does not react to cold temperatures - we kill him and examine the stiffened corpse of the ship's captain. Next to it will be a note with important plot information on mutations, as well as a key with which to open the captain’s cabin. Grab all this stuff along with the ammunition for our shotgun and go back into the corridor.
Now we are interested in freezer No. 1. We go inside and pick up another paper message from Yusupov on the antidote. After that, we go back to the corridor and climb the stairs that lead to the main deck. We will use the next door and another staircase to get to the upper main deck. We pass the corridor, go down a little lower and follow the left side to the captain’s cabin. We will destroy some of the dead who have blocked our path, and go inside the room. We go directly to the desk - there will be a journal on it, which must be read. After that, we will use the metal door to leave the cabin.
Part 9. From the docks to the main drilling module
We climb onto the observation tower and look around. Ahead you can see the round tower, on the doors of which it says "Lift" - this is our new goal. The walls of the tower are washed by strong waves from time to time, so you need to go carefully. We advise you to snuggle on the left side and go around the lift in a circle until the character reaches the door. Once inside, look to the right - there will be a green button nearby that you need to press. After some time, the lift should stop and it will become dark around. We are heading towards the exit marked by a bloody wake. We go outside and immediately run back to the left side, since at that moment a burning zombie will run towards us. We wait a few seconds and move on.
Soon we will have to get to the weapons depot, where you can replenish ammunition. We take everything we need and go to the first-aid post. Inside, we will be met by a local doctor who will share with us useful information about what is happening on the platform. After talking with us, the doctor will leave, and we will be able to replenish our inventory with a harpoon gun and several medical documents. We leave the office and stumble upon the body of the doctor with whom we just talked. Next to it will be the key to the folding room - we select it and move on. Along the way, we will meet several more corpses - we search them and collect useful equipment. We kill several zombies and, finally, get to the warehouse.
Part 10. From closed warehouse No. 1 to the technical corridor
We go around a number of containers, behind which there is a ladder, and rise to the upper level. We kill one zombie (it will appear behind us) and reach the control panel - with its help you can open the lower gate. We carry out the necessary actions, grab the grenade launcher and go down to the exit. To the right should be the entrance to the radio room, which can only be seen in the light of a flashlight. Inside the cabin we will be met by armed people who will immediately open fire. We deal with all the opponents and go upstairs for the diary stopped by Dr. Kamsky. We leave the cabin back into the illuminated corridor. Somewhere halfway around we are attacked by some kind of monster jumping from the ceiling - we shoot at it from a shotgun (this is more effective) and move on. At the end of the corridor is a wide staircase through which we can climb to the upper level. We shoot at the electrical box, pick up the medkit and go through the nearest door.
We turn right and get into another shootout. After that, we go into the door with a blinking light - we will find ourselves in the technical corridor. We go to the very end, simultaneously picking up a variety of supplies, from ammo to first-aid kits, remove a couple of zombies and climb onto the bridge. , .
11.
Continuing our walkthrough Cold Fear. We go around the fire and move towards the lift. We activate the control panel to rise to the upper level, and we reach the bridge. Do not forget that at each new location there are many useful and valuable items, so carefully inspect every nook and cranny during the trip. We jump from the bridge down to be on the roof of the control room, jump again to be already near the entrance. We go inside the room and immediately pay attention to the fire extinguishing system - activate it, go back and go down to the lower platform. The staircase ends with a precipice, so we boldly jump down and go into the door that the fire had previously hidden. We will examine the closed warehouse No. 1 and collect the necessary supplies. Then we return to the upper corridor and pass into the security room (“Security” should be written on the doors). Inside there will be many different zombies and other monsters, so you have to deal with them. We search several corpses and pick up a flamethrower with fuel. After that, we approach the monitors and read the note, which describes the principle of operation of the magnetic silencer. We go back to the corridor and run to the door above which the light blinks. We turn to the right side, we reach the wall, which shows the number "2", and head to the gate.
Part 12. From helipad to elevator
To get through the laser beams, you need to bend down. Carefully moving forward, avoiding various obstacles and, finally, get to the hangar. We clean the bottom of the closed warehouse and go up. Now you need to shoot at the fuel barrel, which is located on the right wall. We finish off those who survived after the explosion and climb the ramp even higher. We will deal with the next military and get to the lift, where the battle with Anishchenko will be waiting for us. We win, and then we tear out Anishchenko’s eye, which will help us get into the communication room.
We return to the bridge and go to the opposite side. We will use a flamethrower to quickly deal with monsters. We get to the gate and run to the far end of the corridor, where the security room is located. Behind the partition there will be another door that will lead us to the communication room. Indoors, not far from the dead man in a doctor’s dressing gown, we find the key to the elevator. We return the same way that we came. Once at the lift, we examine the corpse - we find a note and a medical kit. Use the green button to activate the elevator.
Part 13. From the residential module to the underwater tunnel
We pass to the other side of the bridge and reach the rest room. We continue to move forward until we come across a door on which red mucus is visible. We go inside the room, deal with all the crawling monsters and shoot at the electrical box. Now we go to the left and look for the place where the passage to the cave is located. We climb to the upper level and find ourselves in the main corridor. We get to the room where the guard should rest - we clean it inside, pick up supplies and a letter for Yusupov, after which we go back and return to the very end. We get to the underwater lift, with which we can go down to the laboratories.
Part 14. Laboratory complex
We continue our journey through underwater laboratories, simultaneously dealing with various opponents. In one of the rooms we come across a document from which we can learn more about the experiments conducted on the ship. We try to start the computer (fail), and then go to the morgue. We deal with a couple of the undead, search the bodies, and pick up ammunition from the floor. After that, we go to a neighboring laboratory, where we will be able to read Baharev's diary. We will use the green button, which should activate the laser system. We observe how one of the corpses is cut by a red ray and a terrible monster appears from it. We deal with the creature and inspect the control panel - the next part of the diary should lie on it.
At this interesting place, we conclude our walkthrough and review of Cold Fear. We hasten to please - this is not the end of the game! Unfortunately, the continuation - Cold Fear 2 - did not follow, but the plot of the first part is not yet complete! Ahead, the main character will face the last boss, a victory over which should decide the outcome of the whole game. In order not to reveal all the details, we advise you to complete the passage of Cold Fear yourself. From this moment, the levels become linear, so there should not be any special difficulties with navigation.
Codes for Cold Fear
Surely many gamers are now interested in the question of whether there are any additional cheats for this game. On the Internet you can find and download the following files:
- Trainers for Cold Fear (options +4 and +10) are programs that allow you to change game parameters (for example, hp or ammunition stock).
- Crack.
- Save-files - files with already saved progress (work for Cold Fear on the PC version).